Posted on Jul 21, 2020 in General |
Fruit of the Spirit: Faithfulness
Enjoy the following activities while sharing with your kids the fruit of the spirit- faithfulness!
Posted on Jul 14, 2020 in General |
Fruit of the Spirit: Goodness
Posted on Jul 14, 2020 in General |
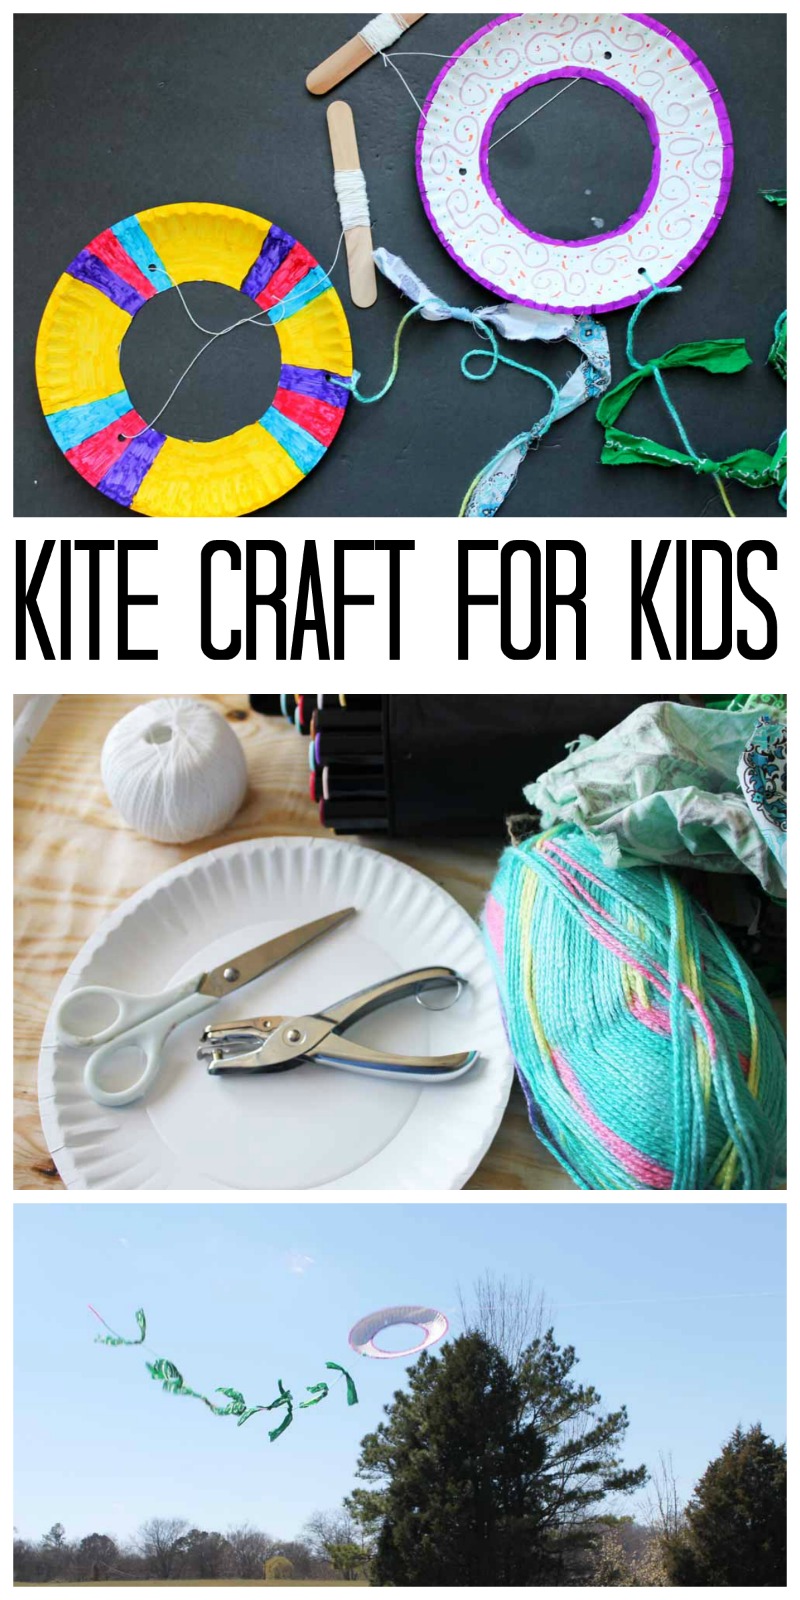
Supplies needed for this kite craft:
- Paper plates
- Markers
- Scissors
- Hole punch
- Kite string
- Yarn or other string
- Scrap fabric
- Craft sticks
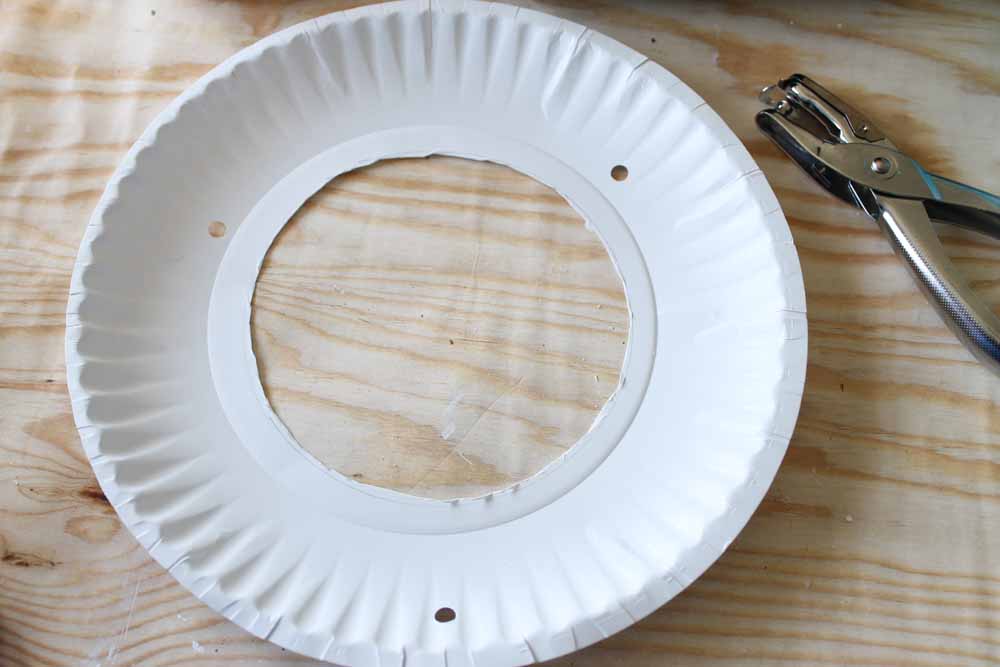
Step 1: Create the Body of Your Kite
Start by tracing anything round in the center of your paper plate and cutting out a hole with scissors. Older children can definitely do this step themselves but younger ones might need a bit of help.
Get out your hole punch and add some holes to the plate.
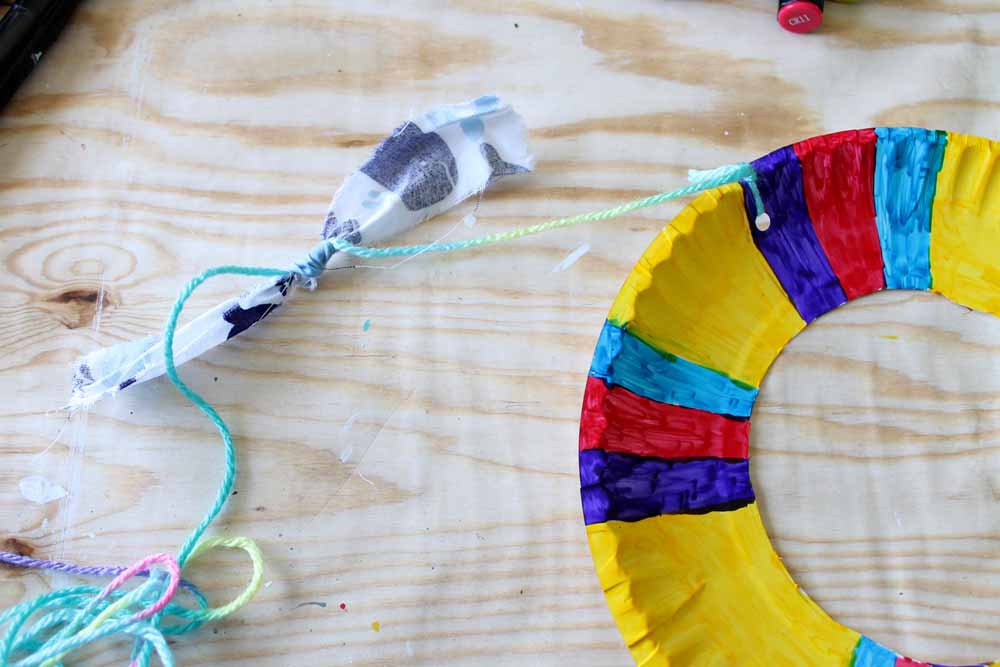
Step 2: Color Your Paper Plate Kite!
Now you can let the kids loose with the markers. Let them decorate their kites in anyway that they want. Decorate one or both sides….this part is completely up to their imagination. After they are happy with their kite craft, add a long piece of yarn to the punched hole that is close to the outer edge. Tie on pieces of scrap fabric to make a fun kite tail. Any extra yarn and fabric will work for this part of the kite.
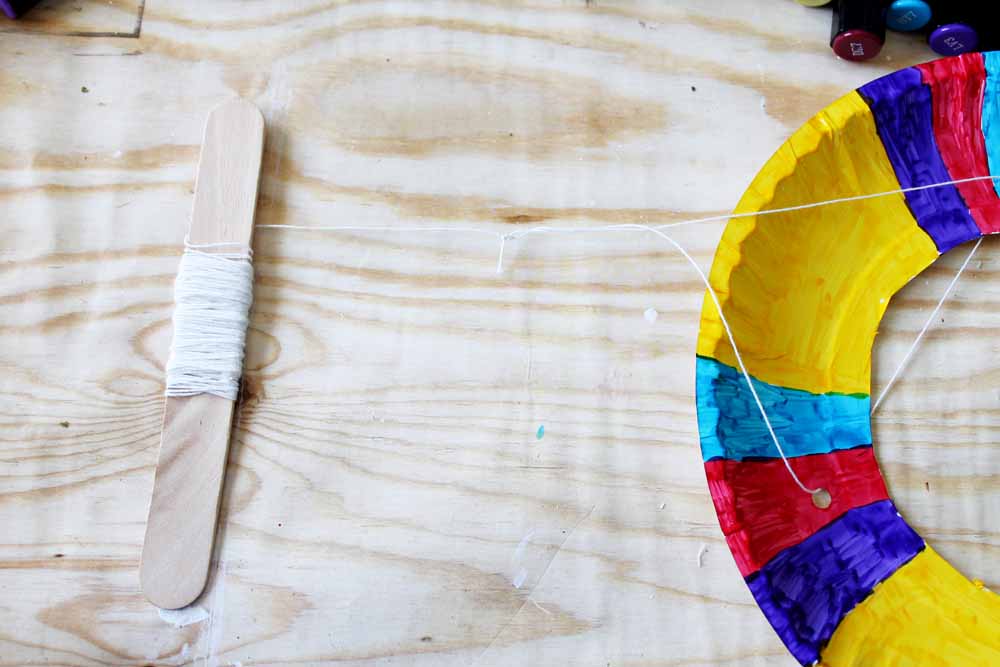
Step 3: Attach Your Kite String
Next you need to make it a kite! Add some kite string through the two remaining holes and tie.
Unwind a long piece of string and cut. Then wrap around a craft stick. This will keep your string neat and give the kids something to hold onto when flying the kite. NOTE: Tie the very end of your kite string to the craft stick to prevent the kite from blowing away in heavy winds.
Step 4: Time to Fly Your Paper Plate Kite!
Head out and give your new kite a test drive!
Some tips and tricks for flying your kite:
- Make sure you try to fly your kite on a windy day. Don’t want to wait? You can try running around and see if you can get the kite off the ground a bit but don’t expect to really get it in the air without the wind.
- Stand with your back to the wind and hold the craft stick. Allow the wind to catch your paper plate kite and begin to lift it.
- Let out on the string as the kite begins to fly. See just how high you can get it!
- Can’t get the kite up? Have a friend help by throwing the kite into the air while you hold the string. Again make sure the wind is to your back.
- Have a contest and see who can get their paper plate kite the highest!
Posted on Jul 9, 2020 in General |
The Fruit of the Spirit: Kindness
Posted on Jul 9, 2020 in General |
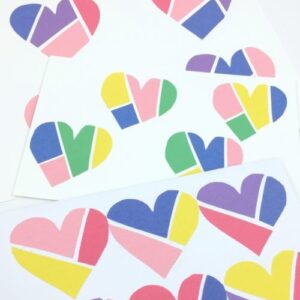
**You can make this into a card or bookmark!
Directions:
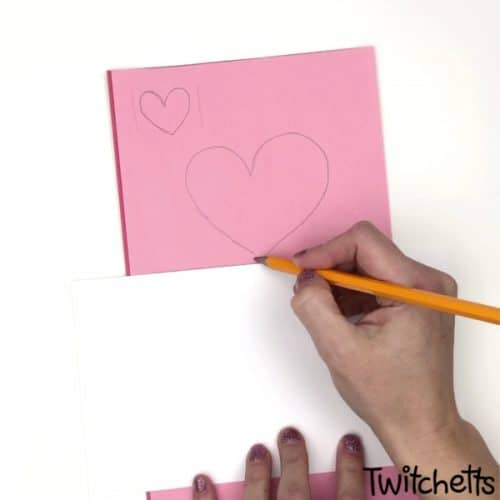
1. Start by stacking 3 different colors of construction paper one on top of another.
2. Repeat drawing process with a piece of white cardstock cut in card size.
3. Cut the hearts, holding all three construction papers firmly. Our goal is to have 3 smaller and 3 bigger hearts, each in 3 different colors and exactly the same size.
4. Hold bigger hearts together and cut them in 4 pieces. Cut smaller hearts in 3 pieces, making sure to hold all 3 pieces together firmly.
5. Flip hearts on the other side to hide pencil (or marker) when gluing on white cardstock.
Arrange the broken hearts in such a way to have 3 different color pieces for each heart (smaller hearts).
6. Glue each of the mended hearts using a glue stick. Make sure to leave a bit of white cardstock visible between pieces.
Supplies:
- Construction Paper (any colors you like!)
- White Cardstock
- Scissors
- Glue Stick
- Black Marker or Pencil
Posted on Jun 30, 2020 in General |
See the World with Love Glasses Craft
Supplies:
-3 pipe cleaners per glasses
-scissors
That’s it!
*If you print the template you can use tape or glue to assemble the glasses
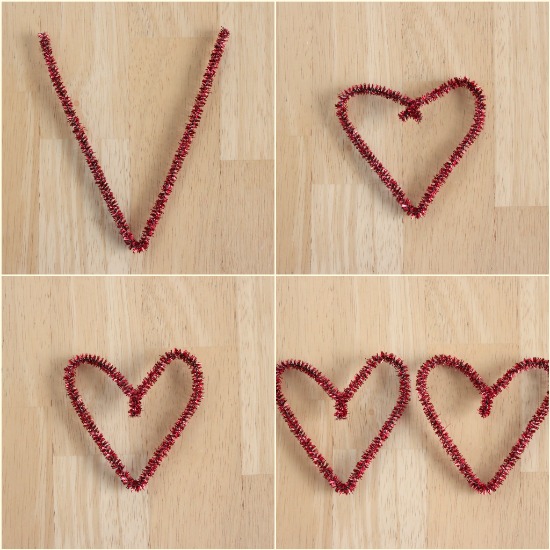
Directions:
1. Bend one pipe cleaner in half into a V shape.
2. Bend the two ends together to form a heart indent. Repeat with second pipe cleaner.
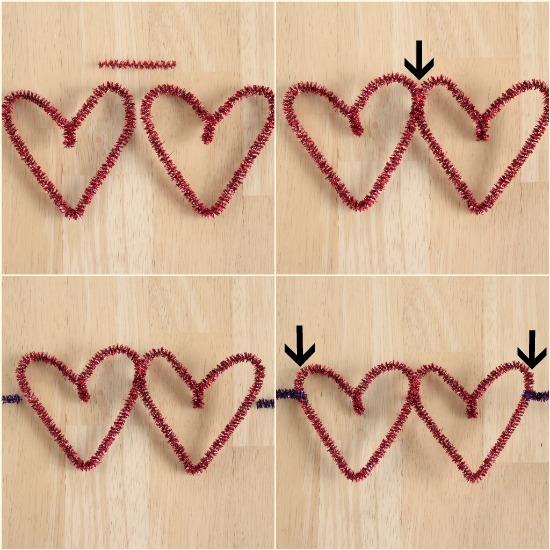
3. Cut a small 1/2 inch piece of pipe cleaner. Use this to attach the two hearts together at the eye glasses “rim”.
4. Cut 1 more pipe cleaner in half. Attach each half onto the outside of each heart, to create the part that goes over the ears.
Posted on Jun 30, 2020 in General |
During this lesson, we explore how each of us put’s God first in our lives? Do you sometimes forget to give to God first? You can use an example of a banana to help illustrate for your kids what happens when we spend our time or money on something else first by taking bites of a banana until there is nothing but the peel or “scraps” left for God.
Posted on Jun 25, 2020 in General |
Supplies:
- Cloud printable-click here to download
- construction paper (red, orange, yellow, green, blue, purple) *you could also use white paper and have your kiddos color each strip one of the colors of the rainbow
- colored pencils, markers
- glue
- tape
- pipe cleaner (OR yarn, string)
Directions:
The first thing you will want to do is print out the cloud printable onto white cardstock or paper.
You will need to cut out the construction paper into 1 1/4″ strips. Each child will need a red, orange, yellow, green, blue and purple strip of construction paper.
Kids can
color in the Faithful letters on their cloud. Using rainbow colors on the letters greatly compliments the craft’s finished look!
Take each of their strips of construction paper and
glue it to the back of the cloud. Have them put a little bit of glue on the top of each strip and then add it to the back of the cloud one at a time, working from left to right (purple, blue, green, yellow, orange and red.)
In order to allow the craft to hang, bend a pipe cleaner in half and attach it to the top of the cloud on the back with a piece of tape.
Posted on Jun 18, 2020 in General |
Supplies: paper, fruit loops (or beads), glue
Directions:
1. Draw a rainbow and write the words “God keeps his promises!” or “A Rainbow is God’s Promise”
2. Glue fruit loops or beads in order of the rainbow. Let dry.
Happy Father’s Day! Here is a fun Father’s Day craft to do with your kiddos!
Posted on Jun 17, 2020 in General |
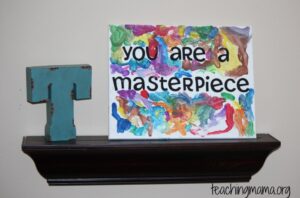
You are God’s Masterpiece